Difference between revisions of "Virtual Private Network"
| Line 107: | Line 107: | ||
== Installing Remote Desktop Connection on Windows 10 == | == Installing Remote Desktop Connection on Windows 10 == | ||
| + | //For this part you'll need to know the name of your work computer. If you don't know your computer's name contact us at ext: 8888 or at techsupport@csunas.org | ||
| − | Windows 10 has Remote Desktop Connection installed as a built-in application. To open it, simply click on the Start button and type "Remote Desktop". | + | //Make sure that Global Protect is connected and running. |
| + | |||
| + | 1. Windows 10 has Remote Desktop Connection installed as a built-in application. To open it, simply click on the Start button and type "Remote Desktop". Click on "Remote Desktop Connection". | ||
| + | |||
| + | 2. Click on "Show Options". | ||
| + | |||
| + | 3. Enter your computers name and your CSUN username. // your username should be your fist and last initial followed by some numbers. | ||
| + | |||
| + | 4. Click on "Save As". | ||
| + | |||
| + | 5. Scroll up or down if needed and click on "Desktop". | ||
| + | |||
| + | 6. For the "File name" enter your computers name and click on "save". | ||
| + | |||
| + | 7. Go back to your desktop and click on the shortcut you just created. | ||
| + | |||
| + | 8. Check on the box that says "Don't ask me again for connections to this computer" and click on connect. | ||
| + | |||
| + | 9. Enter your CSUN password, and you should be connected to your work computer. | ||
| + | |||
| + | When you want to connect to your work computer, now all you have to do is click on the shortcut you created and enter your CSUN password. | ||
[[Category:User_Guides]] | [[Category:User_Guides]] | ||
Revision as of 18:04, 17 April 2020
Contents
Introduction
All CSUN students, faculty, and staff can use the Virtual Private Network (VPN) to access intranet-only resources from anywhere in the world. Additionally, the VPN can be used in conjunction with Remote Desktop to connect to your office computer remotely. Remote access must be granted via a request to AS-IT. If you have been given permission for remote access, follow the steps below to install the VPN client and the Remote Desktop application on your home computer. You will need administrator privileges on your home computer, as well as the name of your office computer, which AS-IT can provide.
For more information, check the CSUN IT VPN page.
Installing the VPN Client on MacOS
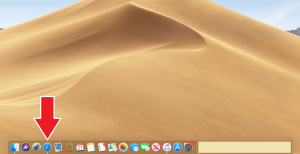
1. First you need to launch Safari
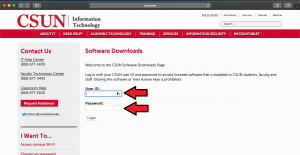
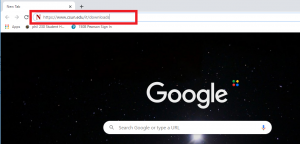
2. On your search bar enter https://www.csun.edu/it/downloads
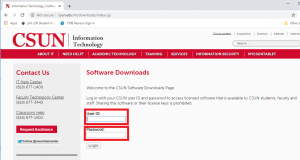
3. Enter your CSUN username and Password
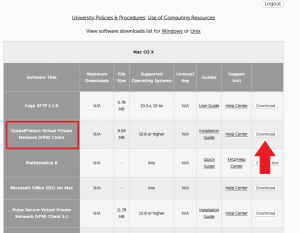
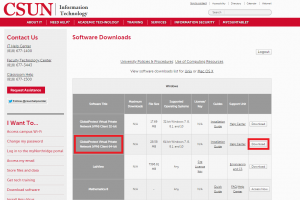
4. Make sure you Download GlobalProtect Virtual Private Network (VPN) Client
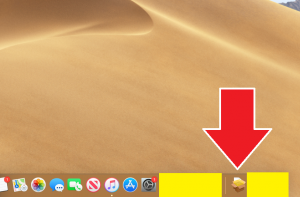
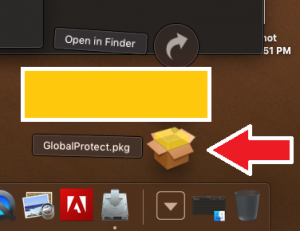
5. The file should be downloading you can access it by clicking on the downloads folder
6. Select the Global Protect
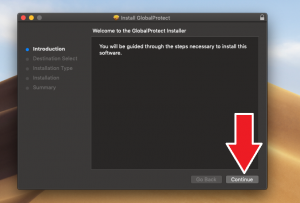
7. Press Continue on the Global Protect Installer.
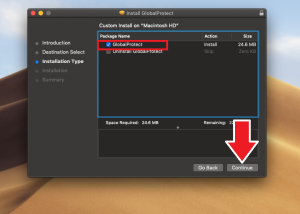
8. Make sure that GlobalProtect is checked off and press continue.
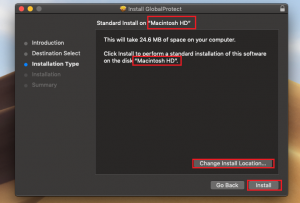
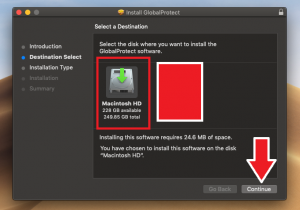
9. Make sure that you're installing GlobalProtect on "Macintosh HD". If It's not selected press "Change install Location" and click on Macintosh HD and continue. Press install after you have selected Macintosh HD.
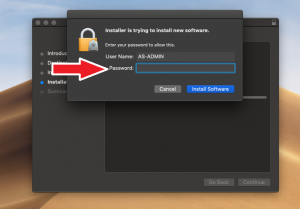
10. Enter your password to continue
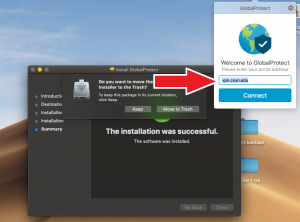
11. Global Protect should open and you'll need to type "vpn.csun.edu" and hit connect. You can close the other windows and move the file to the trash.
It might ask you to enter your CSUN credentials.
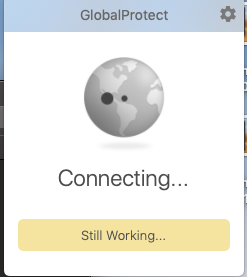
12. Wait while the connection is being made. When it's successfully connected your'e all done!
-JA
Installing the Remote Desktop App on MacOS
1. Lorem ipsum dolor set amit
Installing the VPN Client on Windows 10
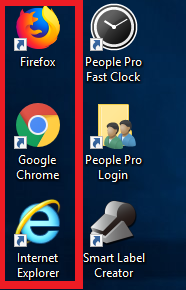
1. Open a web browser (Chrome, FireFox, ect.)
2. In the search tab, enter: https://www.csun.edu/it/downloads
3. Enter your CSUN credentials.
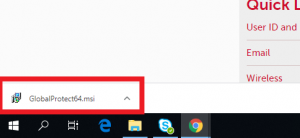
4. Download "GlobalProtect Virtual Private Network (VPN) Client 64-bit".
5. Open the file after it has been downloaded.
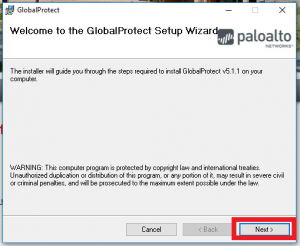
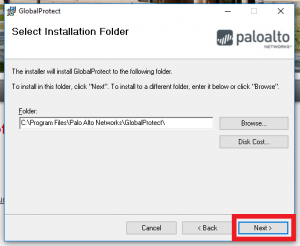
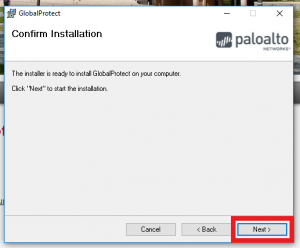
6. Click on next to advance to the next page.
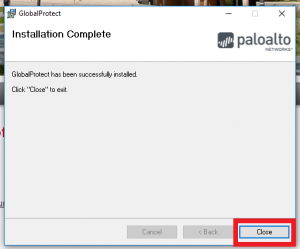
7. Click on "Close" after it is finished installing.
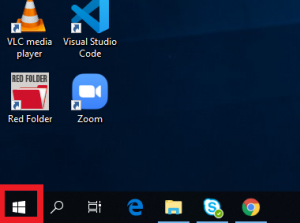
8. Click on the "Start" button
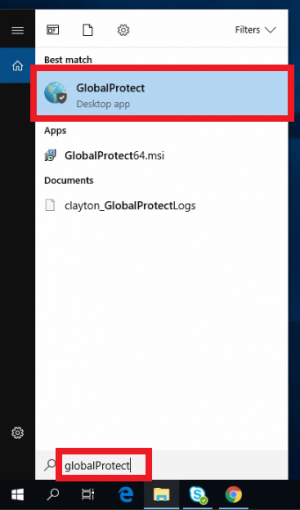
9. Type in "Global Protect" and click on "Global Protect" to launch.
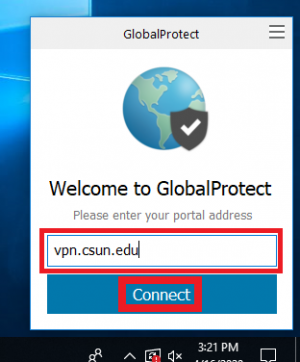
10. On the bottom right of your screen, Global Protect should be opened. Type in "vpn.csun.edu" and click on "Connect".
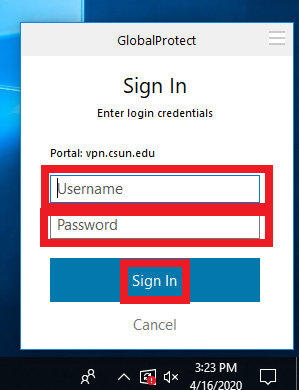
11. Enter your CSUN credentials and click on "Sign In".
-JA, JX
Installing Remote Desktop Connection on Windows 10
//For this part you'll need to know the name of your work computer. If you don't know your computer's name contact us at ext: 8888 or at techsupport@csunas.org
//Make sure that Global Protect is connected and running.
1. Windows 10 has Remote Desktop Connection installed as a built-in application. To open it, simply click on the Start button and type "Remote Desktop". Click on "Remote Desktop Connection".
2. Click on "Show Options".
3. Enter your computers name and your CSUN username. // your username should be your fist and last initial followed by some numbers.
4. Click on "Save As".
5. Scroll up or down if needed and click on "Desktop".
6. For the "File name" enter your computers name and click on "save".
7. Go back to your desktop and click on the shortcut you just created.
8. Check on the box that says "Don't ask me again for connections to this computer" and click on connect.
9. Enter your CSUN password, and you should be connected to your work computer.
When you want to connect to your work computer, now all you have to do is click on the shortcut you created and enter your CSUN password.
