Difference between revisions of "Splashtop"
(→Installing SplashTop Client) |
|||
| Line 6: | Line 6: | ||
[[File:1._Select_Safari.png|thumbnail|none]] | [[File:1._Select_Safari.png|thumbnail|none]] | ||
| − | 2. Type Splashtop.com/downloads on the address bar on your web browser | + | 2. Type "https://www.Splashtop.com/downloads" on the address bar on your web browser |
[[File:2_search_bar.png|thumbnail|none]] | [[File:2_search_bar.png|thumbnail|none]] | ||
| − | 3. | + | 3. Scroll down and click on "MACOS 10.7+". |
[[File:3_Click_on_MAC_OS.png|thumbnail|none]] | [[File:3_Click_on_MAC_OS.png|thumbnail|none]] | ||
| − | 4. Open the downloads tab and click on Splashtop_installer_mac... | + | 4. Open the downloads tab and click on "Splashtop_installer_mac..." |
[[File:4_check_downloads.png |thumbnail|none]] | [[File:4_check_downloads.png |thumbnail|none]] | ||
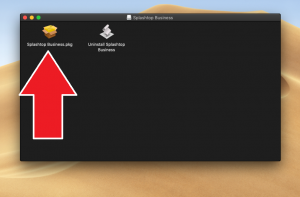
| − | 5. Click the Splashtop Business icon. | + | 5. Click the "Splashtop Business" icon. |
[[File:5_open_installer.png |thumbnail|none]] | [[File:5_open_installer.png |thumbnail|none]] | ||
| Line 21: | Line 21: | ||
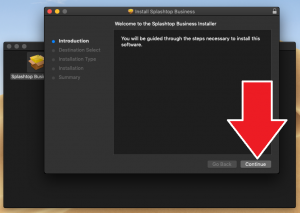
[[File:6_press_next.png|thumbnail|none]] | [[File:6_press_next.png|thumbnail|none]] | ||
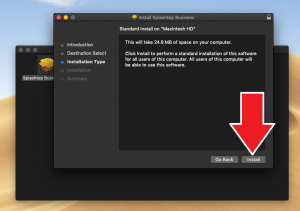
| − | 7. Press Install on the installer | + | 7. Press "Install" on the installer |
[[File:7_press_install.png|thumbnail|none]] | [[File:7_press_install.png|thumbnail|none]] | ||
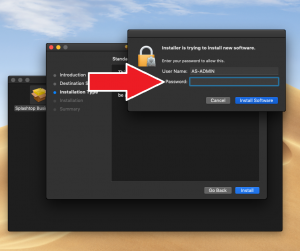
| − | 8.Enter | + | 8.Enter the password you use to login to your MAC and install Splashtop |
[[File:8_enter_password.png|thumbnail|none]] | [[File:8_enter_password.png|thumbnail|none]] | ||
| − | 9. After Splashtop has installed you can close the installer. | + | 9. After Splashtop has installed, you can close the installer. |
[[File:9_Close_the_installer.png|thumbnail|none]] | [[File:9_Close_the_installer.png|thumbnail|none]] | ||
| Line 36: | Line 36: | ||
[[File:11_open_launchpad.png|thumbnail|none]] | [[File:11_open_launchpad.png|thumbnail|none]] | ||
| − | 12. Select SplashTop business. | + | 12. Select "SplashTop business". |
[[File:12_open_SplashTop_Business.png|thumbnail|none]] | [[File:12_open_SplashTop_Business.png|thumbnail|none]] | ||
| Line 42: | Line 42: | ||
[[File:13_sign_in_to_splash.png|thumbnail|none]] | [[File:13_sign_in_to_splash.png|thumbnail|none]] | ||
| − | 14. An AS I.T administrator will need to authenticate the computer that you are remoting from. The administrators | + | 14. An AS I.T administrator will need to authenticate the computer that you are remoting from. The administrators will be notified automatically by email and will approve your request as soon as possible during normal business hours. Please call x8888 if you have any questions. |
[[File:14_authentication.png|thumbnail|none]] | [[File:14_authentication.png|thumbnail|none]] | ||
Revision as of 18:51, 26 March 2020
Introduction
Installing SplashTop Client
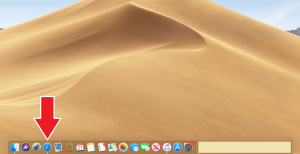
1. Launch Safari from the Dock
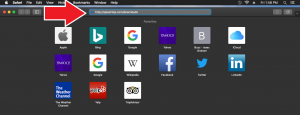
2. Type "https://www.Splashtop.com/downloads" on the address bar on your web browser
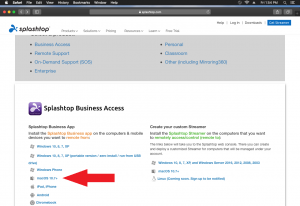
3. Scroll down and click on "MACOS 10.7+".
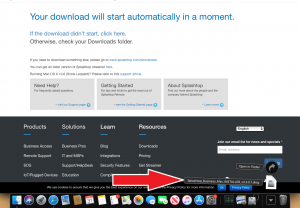
4. Open the downloads tab and click on "Splashtop_installer_mac..."
5. Click the "Splashtop Business" icon.
6. Press next on the installer
7. Press "Install" on the installer
8.Enter the password you use to login to your MAC and install Splashtop
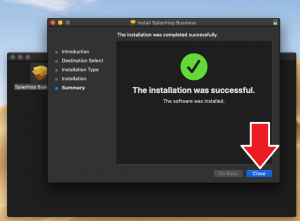
9. After Splashtop has installed, you can close the installer.
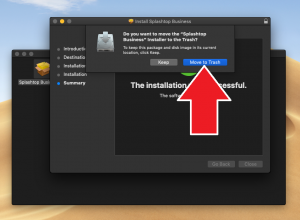
10. When Splashtop has successfully installed, move the installer to the trash.
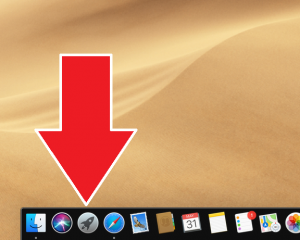
11. Open launch pad.
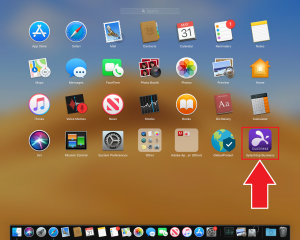
12. Select "SplashTop business".
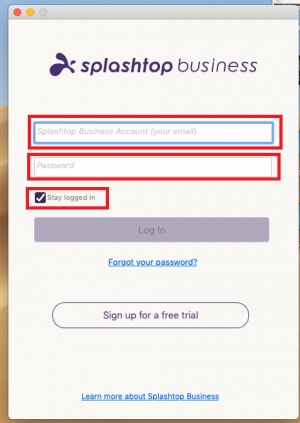
13. Enter your Splashtop Username and password, and check off the box that lets you stay logged in.
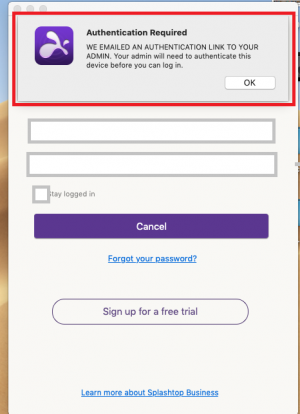
14. An AS I.T administrator will need to authenticate the computer that you are remoting from. The administrators will be notified automatically by email and will approve your request as soon as possible during normal business hours. Please call x8888 if you have any questions.
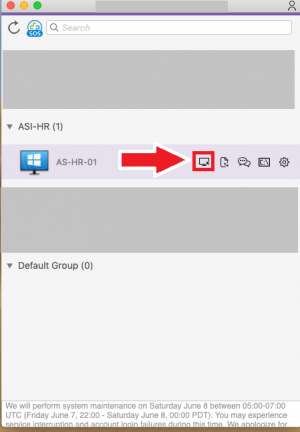
15. After your account has been verified, log back in and select "Connect" next to AS-HR-01
