Zoom
Contents
- 1 Introduction
- 2 Zoom on Windows 10
- 2.1 Downloading and Installing Zoom
- 2.2 Launching Zoom
- 2.3 Joining a Zoom Meeting
- 2.4 Hosting a Zoom Meeting
- 2.5 Finding Your Meeting ID
- 2.6 Resend a Meeting Invitation
- 2.7 Using the "Raise My Hand" Feature
- 2.8 Adding Alternate Hosts
- 2.9 Giving Host Control to Someone
- 2.10 Breakout Room
- 2.11 Using Polling Feature
- 2.12 Update Zoom
- 2.13 How to Create a Departmental Virtual Office
- 3 Zoom on iOS 10.3.3+
Introduction
The purpose of this article is to show highlighted features of Zoom. Full documentation on using Zoom can be found at: https://www.csun.edu/it/zoom
Zoom on Windows 10
This section describes using certain features of Zoom on the Windows 10 platform.
Downloading and Installing Zoom
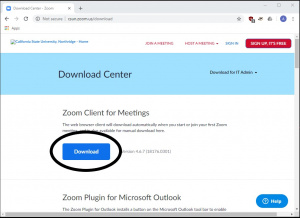
1. Go to https://csun.zoom.us/download
2. Click on “Download” under “Zoom Client for Meetings”.
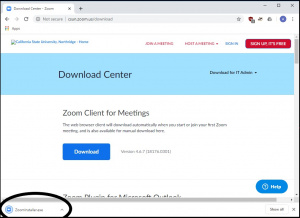
3. Click on the installer that appears at the bottom.
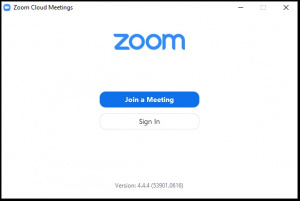
4. Allow the installer to run. Once finished, you will be at the launch screen.
Launching Zoom
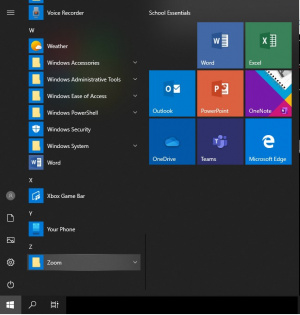
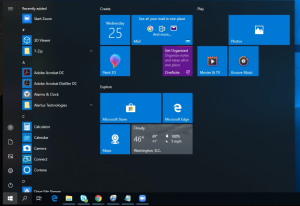
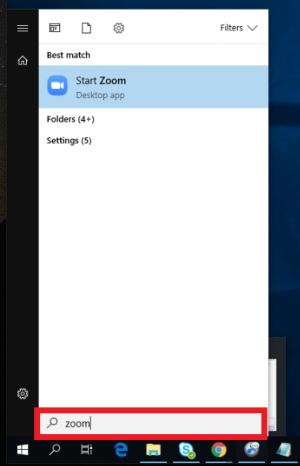
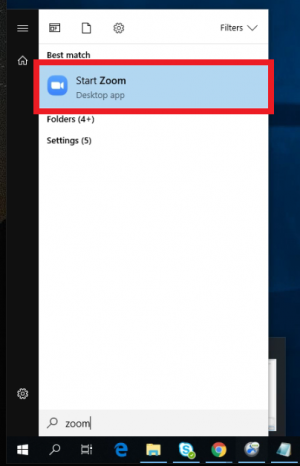
Once Zoom is installed, it can be launched by clicking the "Start" button and scrolling down to "Zoom".
Joining a Zoom Meeting
If you received an email invitation to a Zoom meeting, simply click on the link in the invitation.
If you did not receive an invitation, ask the meeting organizer for the meeting ID number and follow the steps below to join the meeting.
1. Launch Zoom
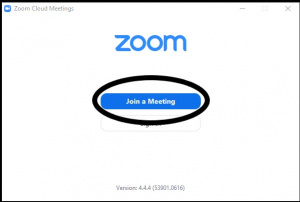
2. At the launch screen, click “Join a Meeting”.
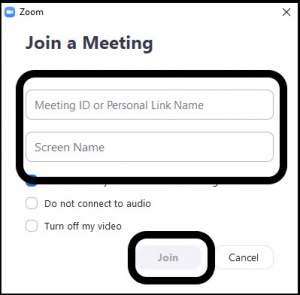
3. Enter the Meeting ID (provided by the Meeting Organizer), a Screen Name (visible to other attendees), and click “Join”.
Hosting a Zoom Meeting
1. Launch Zoom.
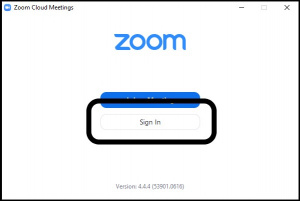
2. At the launch screen, click "Sign In".
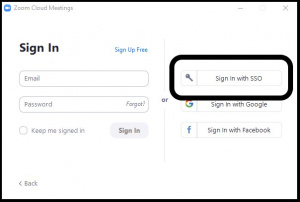
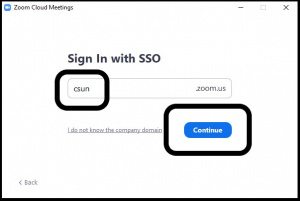
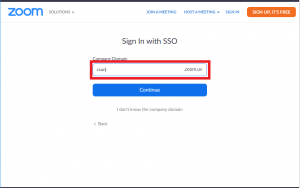
3. Click "Sign in with SSO".
4. Type "CSUN" in the box, then click "Continue".
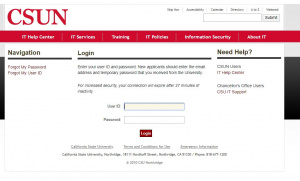
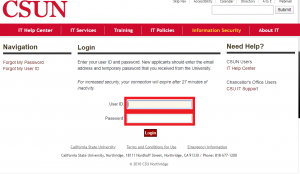
5. Your web browser will open the CSUN SSO page. Enter your CSUN credentials and click "login".
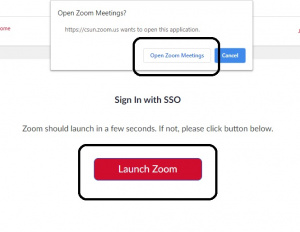
6. Depending on your web browser, Zoom may launch automatically, or ask for permission. If your web browser asks to launch Zoom, click "Open Zoom Meetings".
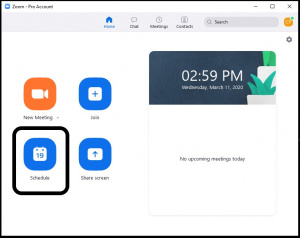
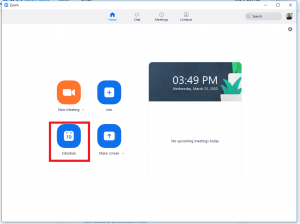
7. From the home screen of Zoom, click "Schedule".
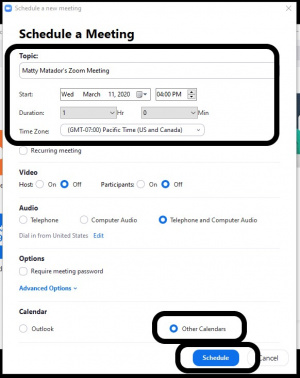
8. In the "Schedule a Meeting" window that opens, fill in the "Topic" section as applicable. The "Video", "Audio", and "Options" settings can be left as default for the majority of meetings. Under the "Calendar" section, click "Other Calendars". Then click "Schedule".
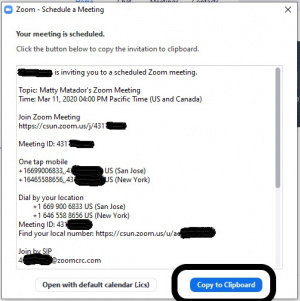
9. In the window that opens, click "Copy to Clipboard" to copy the meeting information. Then click the "X" in the top-right of the window to close it.
10. Open your email application (Outlook, Gmail, Apple Mail), compose a new email, and paste the meeting information. Send the meeting information via email to whomever needs to attend the meeting.
Finding Your Meeting ID
If you are the Meeting Organizer and need to find the meeting ID for a meeting that you scheduled, follow the steps below.
1. Launch Zoom.
2. On your home screen, any scheduled and upcoming meetings will show on the right-side of the screen, with the Meeting ID. Give this Meeting ID to anyone that needs to join.
Resend a Meeting Invitation
If you would like to resend a meeting invitation, follow the steps below.
1. Launch Zoom.
2. From the home screen of Zoom, click "Meetings".
3. Scroll down to the desired meeting and click "Copy Invitation".
4. Open your email application (Outlook, Gmail, Apple Mail), compose a new email, and paste the meeting information. Send the meeting information via email to whomever needs to attend the meeting.
Using the "Raise My Hand" Feature
As a Host
If you are the host you'll be able to lower hands and view how many hands are raised.
To lower hands, follow the steps below.
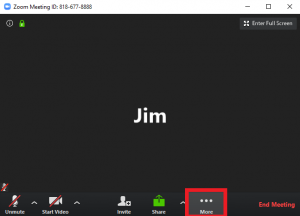
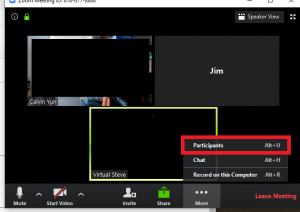
1. Click on "More".
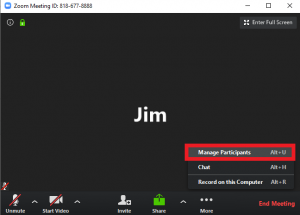
2. From the "More" menu, click on "Manage Participants".
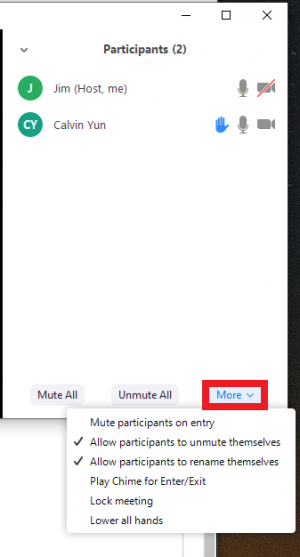
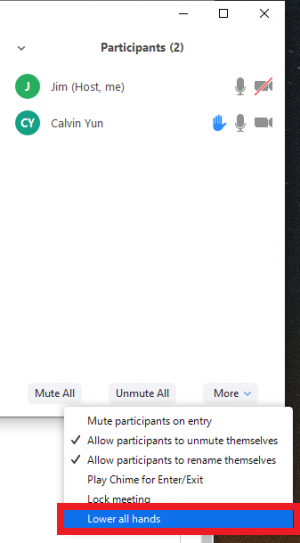
3. To lower all hands in the "Manage Participants" page, click on "More".
4. From the "More" tab, click on "Lower all hands".
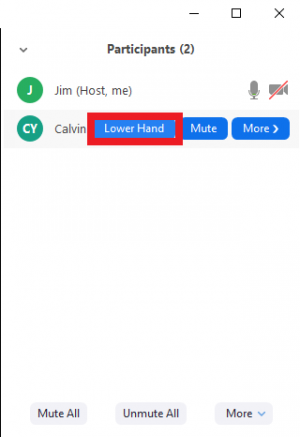
5. If you want to lower only one hand, in the "Manage Participants" page hover over the person's name and click on "Lower Hand".
-ja,jx
As a Participant
If you're a participant and you would like to raise your hand, follow the steps bellow.
1. Click on "More".
2. In the "More" menu, click on "Participants".
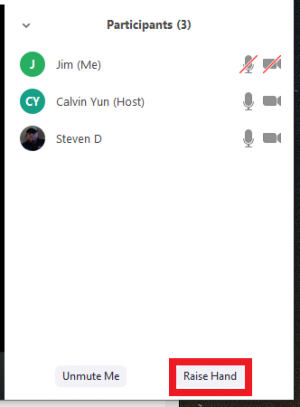
3. In the "Participants" menu on the bottom right, click on "Raise Hand"
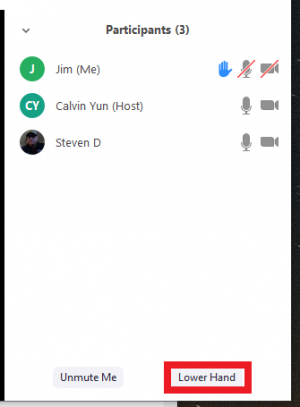
4. To lower your hand in the "Participants" menu on the bottom right, click on "Lower Hand".
-ja,jx
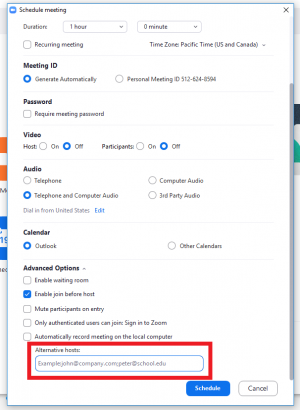
Adding Alternate Hosts
If you are scheduling a Zoom meeting and you want to add an alternate host, follow the steps below.
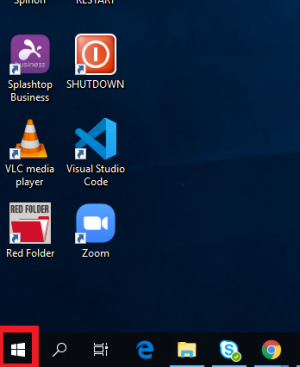
1. Click on the "Start" button on the bottom left.
2. Type in "Zoom" in the search box and the Zoom application should appear.
3. Click on "Start Zoom".
4. Click on "Schedule".
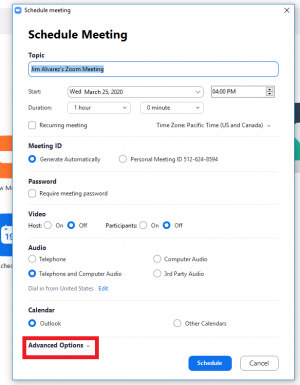
5. Click on "Advanced Options"
6. In "Alternative Hosts" enter the email address of the alternate host you want to add, and continue with the scheduling.
The alternative host will receive an email letting them know that they have been added as an alternative host.
-ja,jx
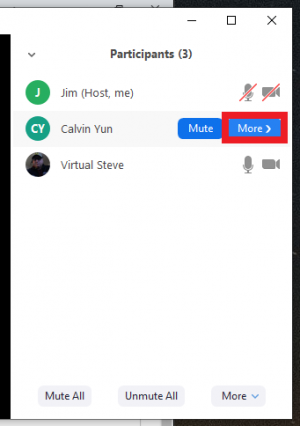
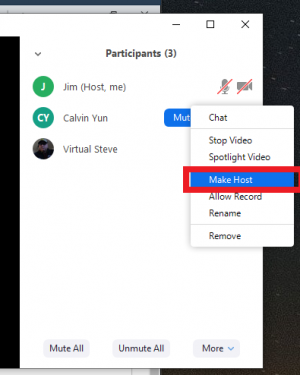
Giving Host Control to Someone
If you are the host, you can make someone else the host. You'll then turn into a participant with no host privileges, but you can regain host controls if you started the meeting.
If you want to make someone else the host, follow the steps below.
1. Click on "More".
2. In the "More" menu, select "Manage Participants".
3. Hover over the person you want to make a host and click on "More".
4. Click on "Make Host"
-ja,jx
Breakout Room
"Breakout rooms are sessions that are split off from the main Zoom meeting. They allow the participants to meet in smaller groups. Breakout rooms can be used for collaboration and discussion of the meeting."
As a host or co-host
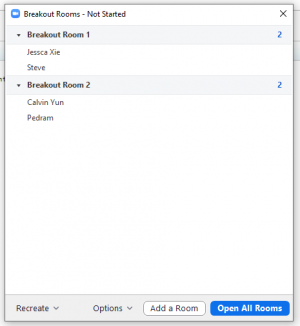
As a host you can create the break room, and assign who you'll want to be in the break room. To create the break room follow the steps below,
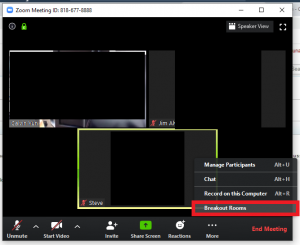
Creating Breakout Rooms
1. Click on "More". If "More" doesn't appear skip to step 2.
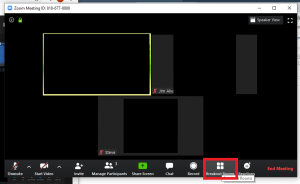
2. There's 2 different ways the breakout room button will appear. Check which screen looks similar to yours and click on "Breakout Rooms".
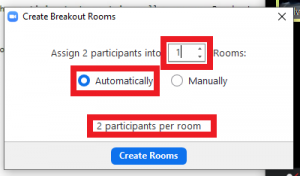
3. Enter the number of breakout rooms you'll want to create, and select "Automatically" to randomize the participants into a room. Zoom will tell you how many participants will be in each breakout room.
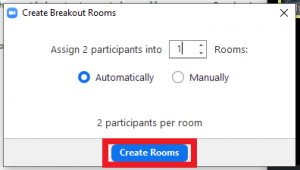
4. Click on "Create Rooms".
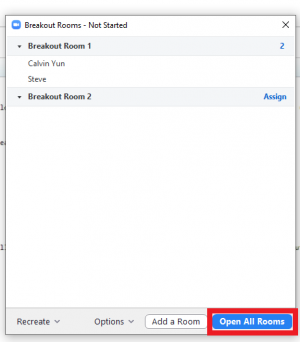
5. Click on "Open all Room".
-ja,jx
Move participants in Breakrooms
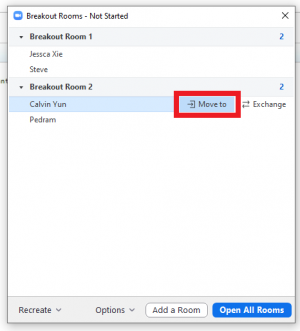
You will need to have more then one breakout room to move participants.
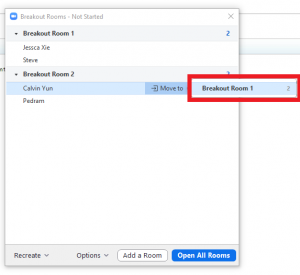
To move participants to different breakout rooms, follow the steps below,
1. Open the breakout room menu.
2. Hover over the participant and select "Move to".
3. Click on the breakout room you want to move the participant to.
-ja,jx
Joining different breakout rooms
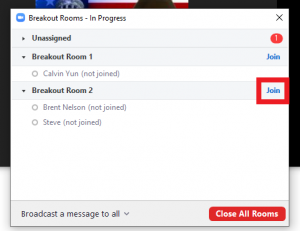
As the host, you're able to join different breakout rooms after they have been created and opened. Follow the instructions from above to create breakout rooms and open them.
To join different breakout rooms, follow the steps below.
1. Click on "Breakout Rooms". If "Breakout Rooms" doesn't appear click on "More" and then "Breakout Rooms".
2. Click on "Open All Rooms".
Note that the breakout rooms might already be open.
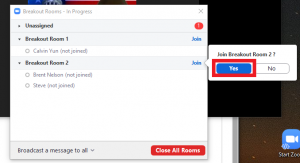
3. Click on "Join" next to the room you want to join.
4. Click on "Yes join room"
Note if some participants aren't assigned to a breakout room you can click on the arrow next to "Unassigned" and hover over the participants name and click on "Move to".
5. To join a different breakout room follow the instructions again, but click join on a different room.
-ja,jx
As a participant
Join a Breakout Room
To join a breakout room as a participant, follow the steps below.
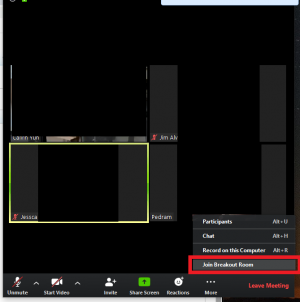
1. Click on "More".
2. Click on "Join Breakout Room".
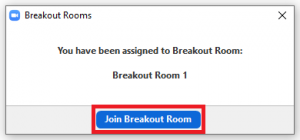
3. Click on "Join Breakout Room".
-ja,jx
Leave Breakout Room
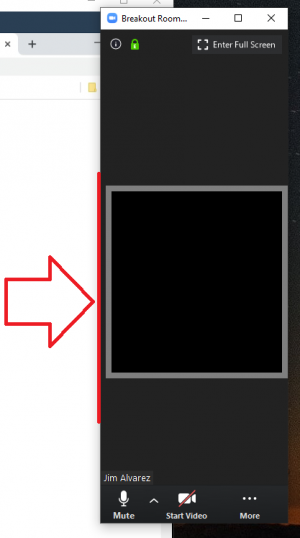
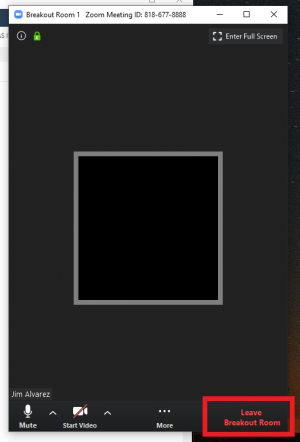
To leave the breakout room make sure that your "Zoom window" is a large size. If your "Zoom window" is too small, the "Leave Breakout Room" button will not appear.
If your screen is too small, click on the side of the window (The mouse will turn into two arrows on each side) and drag it bigger.
See the example below.
Follow the steps below to leave a "Breakout Room"
1. Click on "Leave Breakout Room"
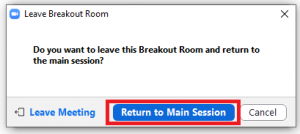
2. Click on "Return to Main Session"
-ja,jx
Using Polling Feature
"The polling feature for meetings allows you to create single choice or multiple choice polling questions for your meetings. You will be able to launch the poll during your meeting and gather the responses from your attendees. You also have the ability to download a report of polling after the meeting."
You'll need to make sure that Zoom is up to date. You can scroll down to "2.12 update Zoom" for instructions on updating zoom.
There would be multiple choice questions created and the participants can vote. Only the Host that created the meeting will be able to create the polls, the Co-hosts can only launch the polls, share results, and can NOT vote.
If you make someone else the host they won't be able to create polls.
Enabling the Polling Feature.
The Host of the meeting will need to have this feature enabled.
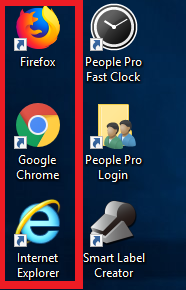
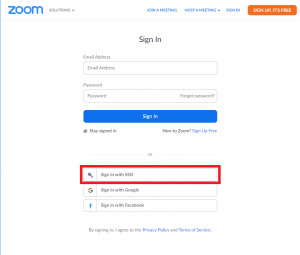
1. Open web browser and go to https://zoom.us/signin
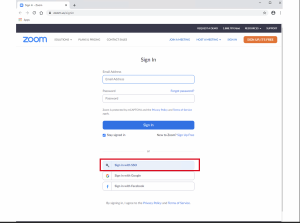
2. Sign in with SSO
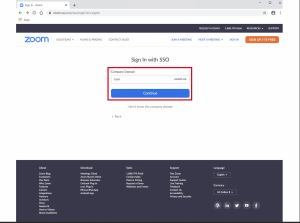
3. "Your Company Domain": CSUN
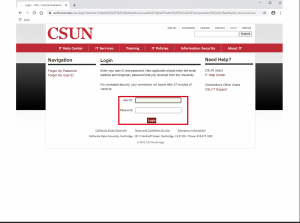
4. Enter CSUN credentials
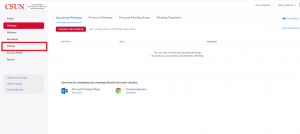
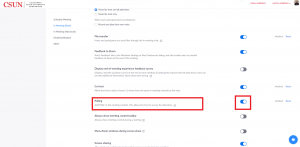
5. On the left select "Settings". Note that the web browser window should be large, so the settings will appear.
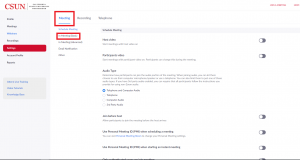
6. Confirm you're in the meetings tab and click on "In Meeting(Basic)".
7. In the "In Meeting (Basic)" section look for the "Polling" option and click on the grey button.
Now when you schedule a meeting the polling feature will be available.
-JA
Creating the polls *In Progress Meeting*
The meeting needs to have been scheduled. If you just start a meeting using "New Meeting", the polls feature won't appear.
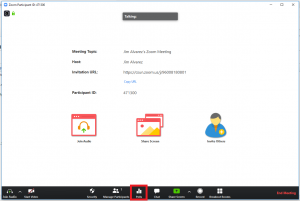
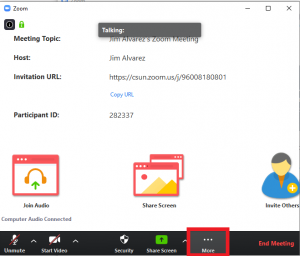
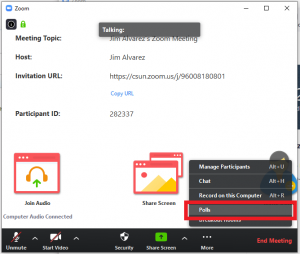
1. Click on "Polls" or on "More" if "Polls" doesn't appear.
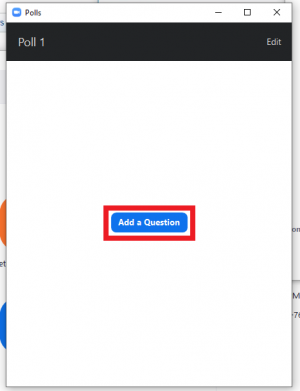
2. Click on "Add a question".
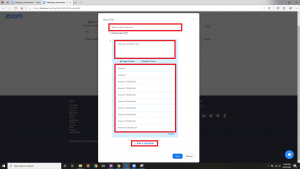
3. The web browser will appear. Fill in the information as needed.
"(Optional) Check the box to make the poll anonymous, which will keep the participant's polling information anonymous in the meeting and in the reports.
Select whether you want the question to be single choice(participants can only choose one answer) or multiple choice question(participants can choose multiple answers)."
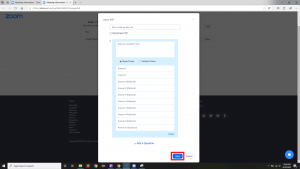
4. Click on "Save".
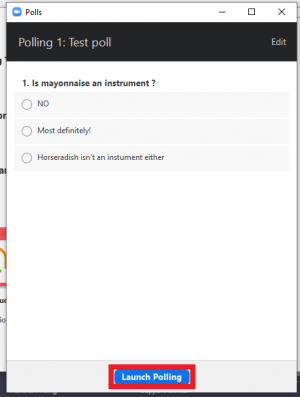
5. Go back to your zoom meeting and click on "Launch Polling".
-JA
Creating the polls before scheduled meeting
If you scheduled a meeting and already enabled the polling feature.
You can create the questions before the zoom session starts.
1. Open web browser and go to https://zoom.us/signin
2. Sign in with SSO
3. "Your Company Domain": CSUN
4. Enter CSUN credentials
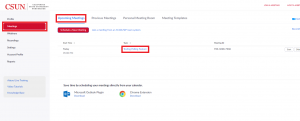
5. Confirm that you're in "Meetings" and in "Upcoming Meetings".
Click on the meeting topic.
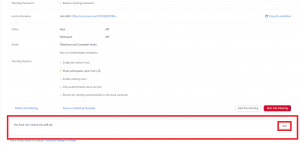
6. Scroll to the bottom where it says "You have not created any poll yet." and click on add.
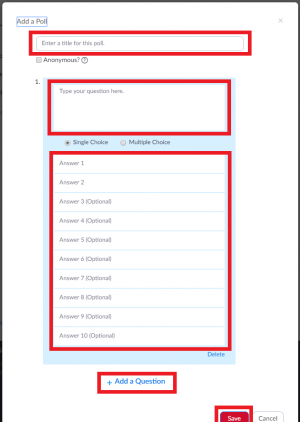
7. Enter a title for the poll. Fill in the questions, answers and click on "Save".
"(Optional) Check the box to make the poll anonymous, which will keep the participant's polling information anonymous in the meeting and in the reports.
Select whether you want the question to be single choice(participants can only choose one answer) or multiple choice question(participants can choose multiple answers)."
-JA
Update Zoom
To update Zoom you need to make sure you're not in a Zoom Meeting.
1.Click on the "Start" button and type in "Zoom" and click on "Start Zoom".
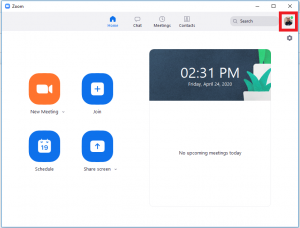
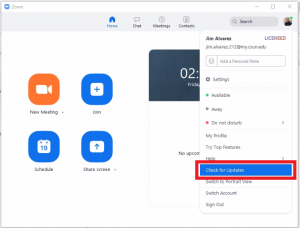
2. Click on your profile picture.
3. Click on "Check for updates".
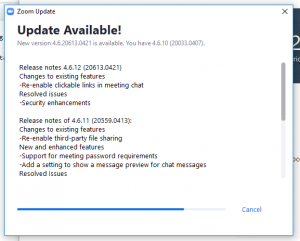
4. If there's an update available it'll begin downloading.
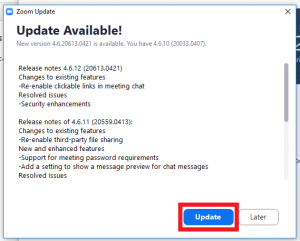
When it's done downloading it'll give you the option to update now or later.
Click on "Update".
Zoom should restart and open up again.
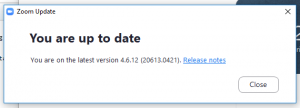
If there's no update available it will say "you are up to date".
-JA
How to Create a Departmental Virtual Office
Zoom allows you to schedule meetings with multiple occurrences. The purpose of this documentation is to create a Virtual Departmental Office for users in the department to constantly use for their meetings. We highly recommend meeting IDs to be the department's phone number. To change the meeting ID, go to your profile on the Zoom website and click on "Edit" in the Personal Meeting ID section.
To schedule a recurring Zoom meeting, follow the instructions below.
0. Confirm the email address for your Co-Hosts, so they could start the Zoom meeting if the host is not available.
It is important to make sure that your Zoom application is up to date. The instructions can be found in the subsection above or can be found here: http://www.csunas.org/it/Zoom#Update_Zoom
1. Click on the "Start" button on the bottom left.
2. Type in "Zoom" in the search box and the Zoom application should appear.
3. Click on "Start Zoom".
4. Click on "Schedule".
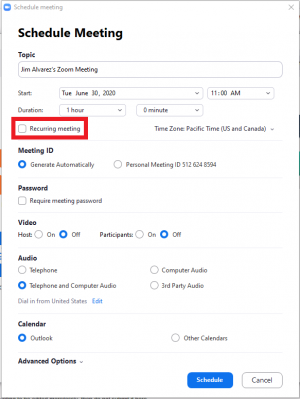
5. Click on "Recurring meeting".
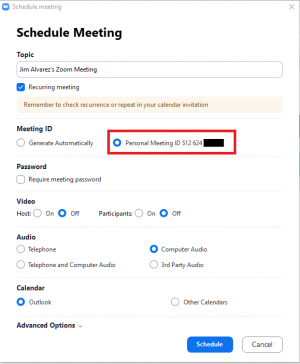
6. Click on "Personal Meeting ID xxxxxxxxxx". This ID should be the department's phone number.
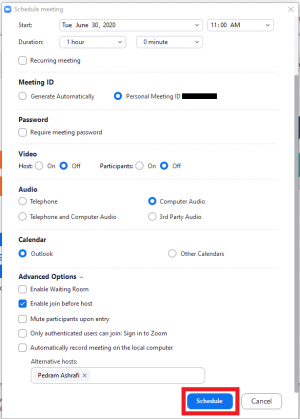
7. Click on "Advanced Options" to add a co-host. If you do not want to add a co-host, skip to Part 9.
8. Enter the email address for the alternate hosts (co-host). The alternate host will be able to start the meeting if the host is not present, and they can start or end polls.
9. Click on "Schedule".
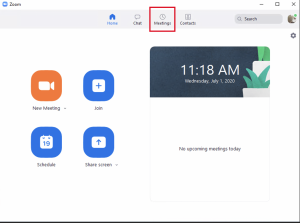
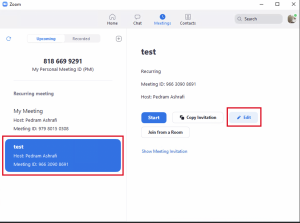
10. To make the meeting recurring, go to the "Meetings" tab.
11. Click on the meeting you want to edit and click on "Edit".
12. This will take you to the Zoom website. Sign in with SSO.
13. Enter the Company Domain Name, which should be "CSUN".
14. Enter your CSUN Credentials.
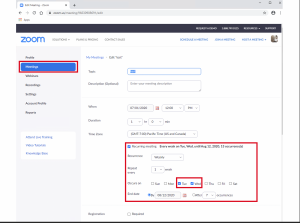
15. You will be taken to the Settings page for the meeting you want to edit. To set-up recurring meetings, click "Recurring meeting" and fill out the meeting details as needed.
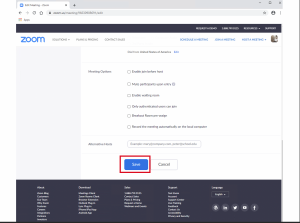
16. Once you are done, scroll down and click on "Save".
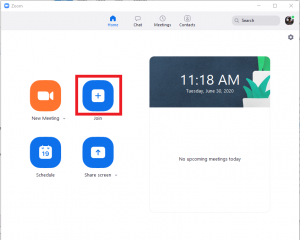
17. To start the Virtual Office, the host or co-host needs to click on "Join".
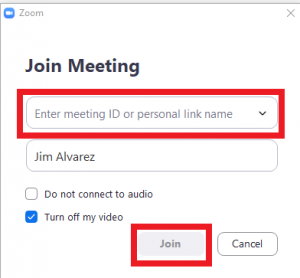
18. Enter the Personal Meeting ID and click "Join".
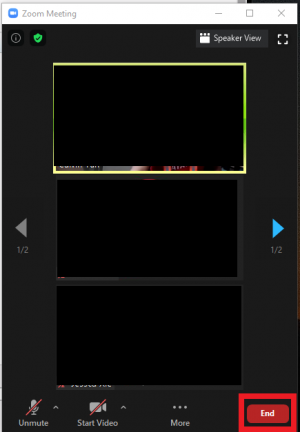
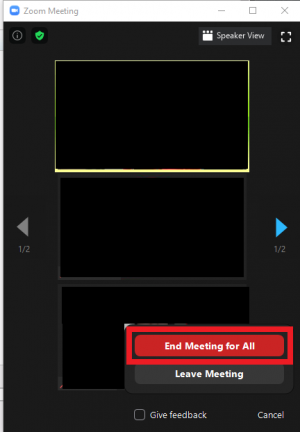
19. When the meetings going to end, click on "end" and "end for all". If you need to leave, but the meeting is still ongoing, make sure to pass the Host to someone else to keep the meeting running.
-PA, JA, JX
Zoom on iOS 10.3.3+
Lorem Ipsum Dolor Sit Amet
