Difference between revisions of "AdobeSign"
(→How to Replace a Recipient After Document is Sent) |
(→How to Replace a Recipient After Document is Sent) |
||
| Line 15: | Line 15: | ||
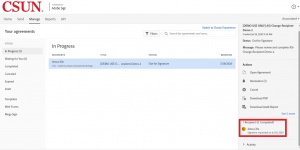
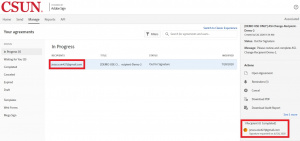
4. When you click on the document, a menu on the side will pop up. At the bottom, hover over the signer’s name and email address. | 4. When you click on the document, a menu on the side will pop up. At the bottom, hover over the signer’s name and email address. | ||
| − | [[File:Hover recipient.jpg|thumbnail]] | + | [[File:Hover recipient.jpg|thumbnail|none]] |
5. A small window will appear that will give you the option to replace the recipient or add an alternate recipient. Click on “Replace Recipient” | 5. A small window will appear that will give you the option to replace the recipient or add an alternate recipient. Click on “Replace Recipient” | ||
Revision as of 17:40, 28 July 2020
Introduction
The purpose of this article is to teach users how to use Adobe Sign.
How to Login to Adobe Sign
How to Replace a Recipient After Document is Sent
1. Login to Adobe Sign. Please refer to the instructions found here:
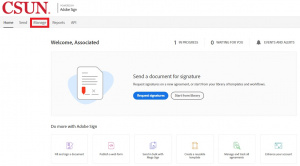
2. Click on the “Manage” tab
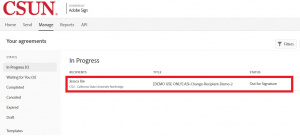
3. In the “In Progress” section, look for the document that needs to be changed* and click on the desired document.
4. When you click on the document, a menu on the side will pop up. At the bottom, hover over the signer’s name and email address.
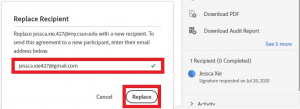
5. A small window will appear that will give you the option to replace the recipient or add an alternate recipient. Click on “Replace Recipient”
6. Insert the email address of the new recipient and then click "Replace." NOTE: You cannot replace the recipient with someone who was a recipient in the past.
7. Once you click "Replace," the recipient will be changed.
-JX
